One-pixel table border with CSS

Problem
I want to have a one-pixel one-color solid border around a table and its cells. Adding border="1" to the table tag isn’t suitable, because it looks horrific in most of the browsers.

Solution
To make the CSS code easier to maintain, we can first set the border color for both table and td and then set the differing part separately. If you later want to change the border color, you only need to change it in one place.

Here is our final code:

<style type="text/css">
/* <![CDATA[ */

table, td
{
border-color: #600;
border-style: solid;
}

table
{
border-width: 0 0 1px 1px;
border-spacing: 0;
border-collapse: collapse;
}

td
{
margin: 0;
padding: 4px;
border-width: 1px 1px 0 0;
background-color: #FFC;
}

/* ]]> */
</style>

<table>
<tr>
<td>Cell 1</td>
<td>Cell 2</td>
</tr>
<tr>
<td>Cell 3</td>
<td>Cell 4</td>
</tr>
</table>
Labels: ,

How to disable skype plugin for one phone number on website using javascript?

skype_phone

CSS trick for Web Developers to DISABLE phone number detection by Skype browser addon (e.g. AVOID "Skype Call" buttons):
Just insert invisible <span> with "_" inside phone number:
+123 456 <span style="display:none;">_</span> 789
Simple!

Labels:

MySQLi Tutorial

Moving from a procedural system to object-oriented can be a daunting task. One feature to assist you is the MySQLi class, which allows for an object-oriented approach to database manipulation. This tutorial gives insight into the structure and basic usage of the MySQLi class. If PDO isn’t an option for you, then try MySQLi!

MySQLi stands for MySQL Improved, and is available from MySQL versions >= 4.1.3 and must be compiled in PHP with –with-mysqli=/path/to/mysql/bin/mysql_config.

There are three hierarchical classes with MySQLi:

  1. mysqli – Represents a connection between PHP and a MySQL database
  2. mysqli_stmt – Represents a prepared statement
  3. mysqli_result – Represents the result set obtained from a query against the database

Each one of these classes represent a different situation. The mysqli class is absolutely necessary because you will be communicating only through this class. It contains the connection to the other two classes (mysqli_stmt and _result). For instance, if you were executing a SELECT statement to pull cities from the states table, you would do something like the following:

<?php
$mysqli = new mysqli('hostname','username','password','database');
//This is where we will query the database and pull using the cities/states SELECT statement
// If the result returns true
if ($result = $mysqli->query("SELECT city FROM state WHERE state='AL'")) {
// So the result returned true, let's loop and print out each city.
// The number of rows returned is assigned to the property "num_rows" in the mysql_result class
echo 'For the state of AL, there are '.$result->num_rows.' cities.
';
// The "fetch_object()" method is the equivalent of the old mysql_fetch_object() function. It allows access to the returned rows within the resouce object ($result in this case).
while ($row = $result->fetch_object()) {
echo 'City Name: '.$row->city.'
';
}
} else {
// Notice below that the errors are still contained within the mysqli class. This means that each result will affect a single "error" property. In otherwords, if your result fails, the error returned from MySQL is assigned to the property "error".
// This means the query failed
echo $mysqli->error;
} // end else
$mysqli->close();
?>

Before we go any further, let’s look at each one of the methods and parameters of the mysqli and mysqli_result class. This tutorial will not cover the mysql_stmt class, as this will be “Part 2″, which will cover prepared statements, and will be available within the next week.


Part 3 of the mysqli tutorial will cover transactions using the InnoDB engine.


mysqli Class Methods:


  • mysqli – construct a new mysqli object

  • autocommit - turns on or off auto -commiting database modifications

  • change_user - changes the user of the specified database connection

  • character_set_name - returns the default character set for the database connection

  • close - closes a previously opened connection

  • commit - commits the current transaction

  • connect - opens a new connection to MySQL database server

  • debug - performs debugging operations

  • dump_debug_info - dumps debug information

  • get_client_info - returns client version

  • get_host_info - returns type of connection used

  • get_server_info - returns version of the MySQL server

  • get_server_version - returns version of the MySQL server

  • init - initializes mysqli object

  • info - retrieves information about the most recently executed query

  • kill - asks the server to kill a mysql thread

  • multi_query - performs multiple queries

  • more_results - check if more results exist from currently executed multi -query

  • next_result - reads next result from currently executed multi -query

  • options - set options

  • ping - pings a server connection or reconnects if there is no connection

  • prepare - prepares a SQL query

  • query - performs a query

  • real_connect - attempts to open a connection to MySQL database server

  • escape_string - escapes special characters in a string for use in a SQL statement, taking into account the current charset of the connection

  • rollback - rolls back the current transaction

  • select_db - selects the default database

  • set_charset - sets the default client character set

  • ssl_set - sets ssl parameters

  • stat - gets the current system status

  • stmt_init – initializes a statement for use with mysqli_stmt_prepare

  • store_result - transfers a resultset from last query

  • thread_safe - returns whether thread safety is given or not

  • use_result - transfers an unbuffered resultset from last query


mysqli Class properties:


  • affected_rows - gets the number of affected rows in a previous MySQL operation

  • client_info - returns the MySQL client version as a string

  • client_version - returns the MySQL client version as an integer

  • errno - returns the error code for the most recent function call

  • error - returns the error string for the most recent function call

  • field_count - returns the number of columns for the most recent query

  • host_info - returns a string representing the type of connection used

  • info - retrieves information about the most recently executed query

  • insert_id - returns the auto generated id used in the last query

  • protocol_version - returns the version of the MySQL protocol used

  • server_info - returns a string that represents the server version number

  • server_version - returns the version number of the server as an integer

  • sqlstate - returns a string containing the SQLSTATE error code for the last error

  • thread_id - returns the thread ID for the current connection

  • warning_count - returns the number of warnings generated during execution of the previous SQL statement


The best way to explain the usage of the mysqli class is to show by example. There are too many methods and properties to go over in this tutorial, so I will only give examples of some.


It’s important to note that some of these methods listed, aren’t methods at all. For instance, if you wanted to get the client library version of MySQL, you would use mysqli_get_client_version(), which returns the integer version. Here is an example:


<?php
printf("Client version: %d\n", mysqli_get_client_version());
?>

You are forced to use the functions since there is no need for the connection to the actual database.


You have already seen the usage of the mysql_result connection from the mysqli class, so let’s go over some more examples:


Getting some info on the result from the mysql database:


<?php
$mysqli = new mysqli('localhost','db_user','my_password','mysql');
// Get all the MySQL users and their hosts
$sql = "SELECT user, host FROM user";
// If the query goes through
if ($result = $mysqli->query($sql)) {
// If there are some results
if ($result->num_rows > 0) {
// Let's show some info
echo 'There were '.$result->num_rows.' rows returned.
';
echo 'We selected '.$result->field_count.' fields in our query.
';
echo 'Our thread ID is '.$mysqli->thread_id.'
';
// Ok, let's show the data
while ($row = $result->fetch_object()) {
echo 'Username: '.$row->user.' :: Host: '.$row->host.'
';
} // end while loop
} else {
echo 'There are no results to display. Odd how we connected to this database and there are no users.';
} // end else
} else {
// Notice the error would be within the mysqli class, rather than mysql_result
printf("There has been an error from MySQL: %s",$mysqli->error);
} // end else
// Close the DB connection
$mysqli->close();
?>

Here we used some common methods and properties to test and display information. Next week we will go over prepared statements and how they might assist in your scripts.


If you have any questions regarding MySQLi, please feel free to put comments and I will answer them soon.


– Will

Labels: ,

WordPress Quick Tip: Remove The Dashboard Update Message

update200x200 A particularly useful function of WordPress is that it informs you when a new update is available to download. This is displayed at the top of your WordPress admin panel and provides a link to the update page where you can automatically install the new available version.

Updating your WordPress installation is important because the latest version will likely contain security updates and will give you access to any new functionality that has been developed.

However, there are occasions where you might not want this message to displayed – for example, if you’re building a WordPress site for a client, you might want to remove the message to stop them from updating the site themselves.

update

This is because sometimes it’s best to initially test the effects of a new WordPress update locally to ensure that it doesn’t cause the site any problems – it’s not unusual to have configuration issues with plugins that cause the website not to display or work properly.

Removing the update message is very straightforward to do – simply add the following lines of code to your functions.php file:

remove_action('wp_version_check', 'wp_version_check');
remove_action('admin_init', '_maybe_update_core');
add_filter('pre_transient_update_core', create_function( '$a', "return null;"));


With wordpress 3.x, we should be using an other way:


go to: wp-admin/includes/update.php


Search:


add_action( 'admin_notices', 'update_nag', 3 );

Replace to:


//add_action( 'admin_notices', 'update_nag', 3 );


Then check your WordPress admin panel and you should see that the message has disappeared.


Whilst this removes the update message, please make sure that you still update to the latest version when it becomes available. Not doing so can leave you vulnerable to security risks, so make sure you’re aware of when new versions are released and ensure that you apply the update.


I hope you found this tip helpful – let me know if you have any questions or comments.


Install Mac OS X On Toshiba Satellite A205-S5804


Hopefully i can do this here...

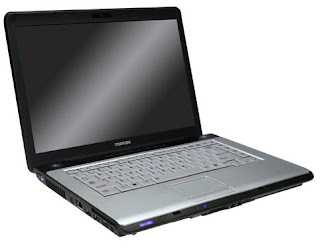
It’s finally here! Down to earth, simple to read, simple to understand tutorial on how to install Mac OS X on Toshiba Satellite A205-S5804 model. If you read my previous article on this subject, you know that it is possible mainly because of Apple’s move to Intel chips. (Wait, did I write about it before?) Anyway, I did a lot of research and have come to believe that Toshiba Satellite is one of the easiest laptops to get Mac OS X working. And by working I mean full video support, sound, Wi-Fi, Ethernet, usb ports, sound adjuster, battery meter, restart and shutdown. Plus, you can run it all on vanilla kernel (original apple kernel).

Toshiba laptops are relatively cheap. Besides, if you want to spend lots of money just to create ‘hackintosh’, I suggest you buying a real Mac instead. Why? Simply because OS X was designed to run on Apple hardware. You won’t have any issues or problems if you run major software update straight from the Apple Software Update. But if you do the same thing on the Toshiba for example, you might get ‘spinning circle of death’ (ha ha, you never heard of the term 'spinning cirlce of death?; you heard 'blue screen of death', havent you?) after reboot. Some can argue that it’s not a big deal if you use modified updates from hackers (good ones) however, you must be willing to spend some time getting your system up to date. (Honestly, it’s not a big deal.)

This tutorial is for educational purposes only. You, of course, assume all responsibility for choosing to follow this tutorial. Also, OS X EULA states that you can run Leopard on Apple labeled hardware only.

Let’s get to work. As I said I use Toshiba Satellite A205-5804. A little of specifications won’t hurt. So here you go, download it from here.

You will need a modified OS X installation DVD with modified boot loader. It will allow you to load, and install OS X with no problems. This is the result of BIOS not being able to recognize Retail OS X DVD as bootable. For this install, I use ‘leo4allv3’.

Here is what you need:

• Leo4allv3 (Google it)
• Drivers (Kext) – here.
• Kalyway 10.5.3 Combo Update with Kernel package (dont ask me where to find it, Google it)

1. Burn your leo4allv3 ISO to a DVD

2. Changing BIOS Settings:

• In BIOS settings, make sure DVD drive is selected as the first booting device. This is required in order to install OS X. No need to change anything else.

3. Booting/Installing leo4allv3:

• Place your leo4allv3 DVD into DVD drive and turn on/restart your laptop.
• At the Darwin prompt, you will read this: “Press any key to start from CD-Rom, or press F8 to enter start up options…” You need to press F8 and type ‘-v’ (without ‘) and press ‘Enter’ to load OS X in verbose mode. After few minutes you should see a window with a choice of different languages. Choose your own and click on ‘next’ button.
• After you see a ‘Welcome Screen’, make sure you don’t click on ‘Continue’ button yet. You need to format your hard drive first. Go to ‘Utilities → Disc utility’. (You should be able to see ‘Utilities’ option on the top bar.)
• Select your hard drive at the top left corner and click on ‘Erase’ tab (located in the middle of the window).
• Choose ‘Mac OS Extended (Journaled)’ from the drop down menu of ‘Volume Format’ and click on ‘Erase’ button. Confirm the erase command.
• Click on ‘Partition’ tab and in the ‘Volume Scheme’ drop down menu choose – 1 Partition. In the Name field type ‘OSX’. Leave the format option to ‘Mac OS Extended (Journaled).
• Now, click on ‘Options’ button at the bottom left corner and choose ‘Master Boot Record’ (MBR), click on OK and hit ‘Apply’ at the main ‘Disk Utility’ window. Confirm the creation of the ‘OSX’ partition. Wait few moments as ‘Disk Utility’ works its way through.
• Close ‘Disk Utility’ by clicking on the red dot at the top of the ‘Disk Utility’ window. You are back to the ‘Welcome’ screen.
• Click on ‘Continue’ button and hit ‘Agree’.
• Select destination hard drive – OSX and click on ‘Continue’.
• Click on ‘Customize’ button just before you click on ‘Install’ at 'Install Summary' window.
• Choose these packages: Under Audio, choose Azalia Audio; under Chipset, don’t select anything; under Kernel option, choose 9.2.0 sleep; under (SMBIOS), choose Apple SMBIOS 667; under Video choose GMAX3100; under Applications, choose all; select Remove Firewire; select Power Management for laptops; select About This Mac; Click on ‘Done’ button.
• After you get back to ‘Install Summary’, click on ‘Install’ (you can skip checking install DVD by hitting ‘skip’ button).
• Installing - wait. At some point it will look like the installation process got stock, its normal. Just wait.
• After you see ‘Install Succeeded’ window, click on ‘Restart’ button.

4. Fixing minor bugs:
Note: Don’t let OS X boot normally, it will most likely get stuck on a cycled reboot at ‘Transfer Your Information Window’ later, during account setup. Instead Press F8 at Darwin boot prompt and type: -v –s (hit enter);
• After you see ‘root#’, type ‘/sbin/fsck –fy’ and hit ‘Enter’ Type /sbin/mount -uw / and hit ‘Enter’ again. (it’s going to take a little time to run script, wait)
• Type ‘touch /var/db/.AppleSetupDone’ and hit Enter;
• You will need to set up password for root, type: passwd (yes, passwd) and hit enter; choose your password.
Note: when you log in for the first time, your user name will be: root and password is the one you set up.
• Now, after you log in, set up your personal account. (It’s not recommended to use ‘Root Account’) Under Settings  User Account, you will have an option of creating an account, do that.
• As you see, you DVD drive don’t show up, you will have to fix it. There is a driver in ‘Driver Folder’ you downloaded earlier called ‘IOATAFamily.kext_V1.1’, open it and install it with KextHelper. (Google it)
• If you want to change default Verbose Loading mode to Regular, do this: go to /Library/Preferences/SystemConfiguration/com.apple.Boot.plist. Open it with BBEdit delete ‘-v’ from the list and it will boot normally.
• To fix Wi-Fi, install rtl8187b drive from the Drivers folder. Restart if needed. Go to 'system/library/extensions folder and find rtl8187.kext' Open it with TextMate and find this line: 33161 and change numbers to 33175. Restart your computer. (Don’t freak out if you don’t see your Wi-Fi connection yet, you will have to install 10.5.3 combo update to make it work as it should!)

5. Updating to 10.5.3:
• Open your folder with Kalyway 10.5.3 Combo Update, and double click on Kalyway UpdCombo10.5.3.pkg to initiate install. Confirm it by entering your password. Note: Do not click on ‘Restart’ after successful install, as it most likely give you lots of problems on boot. Rather leave the window open and navigate to ‘Kalyway10.5.3 Kernel’ (it should have been in the same folder with kalyway combo update). Double click on it to open the installer, and install it WITHOUT selecting any kernel versions. Close the window, get back to 10.5.3 Combo Update window and click on ‘Restart’. (You should be able to restart successfully)
• Power management will not work after 10.5.3 update. To make it work, install Power Management 10.5.3 fix from drivers’ folder.

6. Updating to 10.5.4:
• Navigate to Apple Software Update from your desktop by clicking on ‘Apple’ logo at the top left corner and choosing ‘Software Update’. It will check if your system is up to date, which of course not, so it will show you that 10.5.4 is available. Install it and reboot. Now you should have completely working ‘Mac’ running on latest OS X.

Congratulations on your 100% working ToshiMac!!! If you found this article interesting, please leave a comment. By the way comments are always welcome, so please take 30 seconds of your time to write one. If you want to share your experience, please do so by writing below.
Labels:
2010 WEBSITE20. All rights reserved.